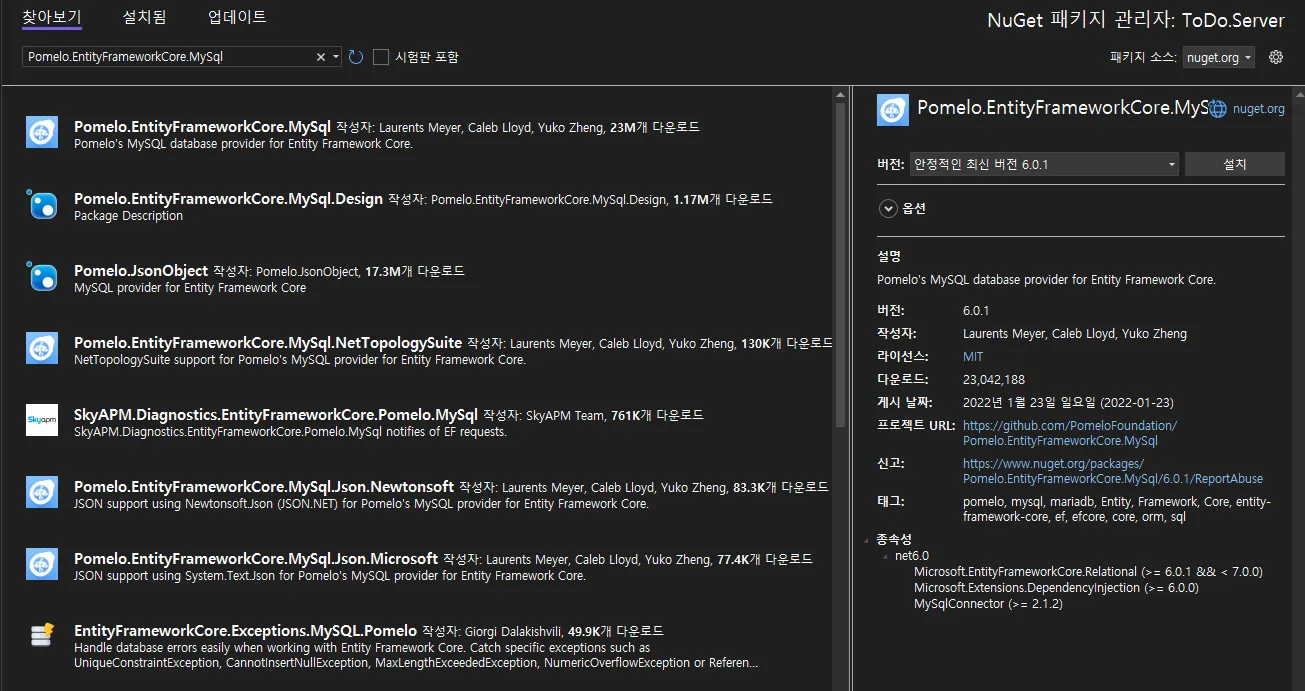
패키지 설치
Web AP 프로젝트에 DB 연동과 Identity Framework, JWT 인증을 위해 다음의 패키지들을 설치한다.
•
Pomelo.EntityFrameworkCore.MySql
•
Microsoft.EntityFrameworkCore.Tools
•
Microsoft.AspNetCore.Identity.EntityFrameworkCore
•
Microsoft.AspNetCore.Authentication.JwtBearer
DB는 MariaDB를 사용한다. MariaDB 설정하는 내용은 아래 글 참조
Entity Framework, Identity Framework, JWT 인증 환경 구성
패키지 설치를 마쳤으면 Web API 프로젝트에 관례를 따라 Models 폴더를 만들고 ApplicationUser, ApplicationRole 클래스를 만든다.
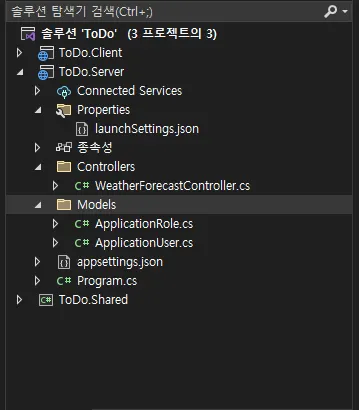
ApplicationUser 클래스는 IdentityUser, ApplicationRole 클래스는 IdentityRole 클래스를 상속받도록 작성한다. ASP에서 제공하는 기본 정보를 사용하고, 추가로 사용하고 싶은 정보가 있다면 프로퍼티로 구현하면 된다.
using Microsoft.AspNetCore.Identity;
namespace ToDo.Server.Models
{
public class ApplicationUser : IdentityUser<Guid>
{
// Identity User에서 기본으로 제공하는 정보 외의 것을 추가하고 싶다면 여기에 프로퍼티 형태로 추가한다.
}
}
C#
복사
using Microsoft.AspNetCore.Identity;
namespace ToDo.Server.Models
{
public class ApplicationRole : IdentityRole<Guid>
{
public ApplicationRole() : base()
{
}
public ApplicationRole(string roleName) : base(roleName)
{
}
// Identity Role에서 기본으로 제공하는 정보 외의 추가하고 싶다면 여기에 프로퍼티 형태로 추가한다.
}
}
C#
복사
클래스 생성 후에는 다시 Web API 프로젝트에 Data 폴더를 만들고 그 아래에 ApplicationDbContext.cs 클래스 파일을 만든다. 이 클래스가 DB 연결을 처리할 클래스이다.
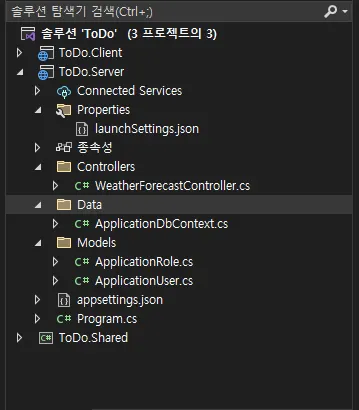
ApplicationDbContext 클래스의 내용은 아래와 같이 작성한다.
using Microsoft.AspNetCore.Identity.EntityFrameworkCore;
using Microsoft.EntityFrameworkCore;
using ToDo.Server.Models;
using ToDo.Shared.Data;
namespace ToDo.Server.Data
{
public class ApplicationDbContext : IdentityDbContext<ApplicationUser, ApplicationRole, Guid>
{
public ApplicationDbContext(DbContextOptions<ApplicationDbContext> options) : base(options)
{
}
public DbSet<ApplicationUser> Users { get; set; }
public DbSet<ApplicationRole> Roles { get; set; }
protected override void OnModelCreating(ModelBuilder modelBuilder)
{
base.OnModelCreating(modelBuilder);
// DB 최초 생성시 넣을 초기 데이터가 있다면 이 아래에 작성한다.
modelBuilder.Entity<ApplicationRole>().HasData(new ApplicationRole
{
Id = Guid.NewGuid(),
Name = "Admin",
NormalizedName = "ADMIN" // RoleManager가 Role을 찾을 때는 일반 Name이 아니라 Normalized 된 Name 값을 사용한다.
});
modelBuilder.Entity<ApplicationRole>().HasData(new ApplicationRole
{
Id = Guid.NewGuid(),
Name = "User",
NormalizedName = "USER"
});
modelBuilder.Entity<ApplicationRole>().HasData(new ApplicationRole
{
Id = Guid.NewGuid(),
Name = "Guest",
NormalizedName = "GUEST"
});
}
}
}
C#
복사
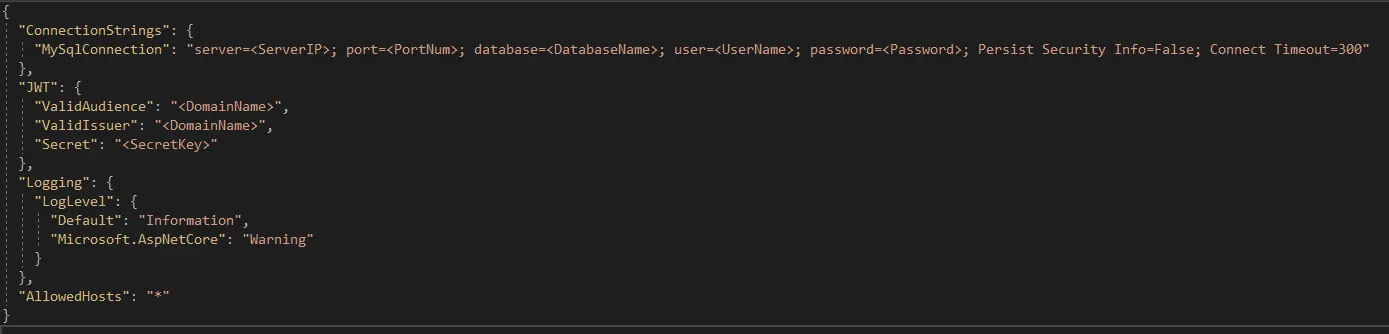
DB에 ToDo라는 이름으로 데이터베이스가 구성되었다는 가정하에 Web API의 appsettings.json 파일에 아래와 같이 connection string과 JWT 관련 설정을 추가한다.
"ConnectionStrings": {
"MySqlConnection": "server=<ServerIP>; port=<PortNum>; database=<DatabaseName>; user=<UserName>; password=<PasswordName>; Persist Security Info=False; Connect Timeout=300"
},
"JWT": {
"ValidAudience": "<DomainName>",
"ValidIssuer": "<DomainName>",
"Secret": "<SecretKey>",
"ExpireDate": 7
},
JSON
복사
다음으로 Web API의 program.cs 파일에 아래의 코드를 추가한다. Identity와 JWT을 사용하기 위한 코드이다.
using Microsoft.AspNetCore.Authentication.JwtBearer;
using Microsoft.AspNetCore.Identity;
using Microsoft.EntityFrameworkCore;
using Microsoft.IdentityModel.Tokens;
using System.Text;
using ToDo.Server.Data;
using ToDo.Server.Models;
ConfigurationManager configuration = builder.Configuration;
string connectionString = builder.Configuration.GetConnectionString("MySqlConnection");
ServerVersion serverVersion = ServerVersion.AutoDetect(connectionString);
// MySql DB를 연결하는 코드
builder.Services.AddDbContextPool<ApplicationDbContext>(options => options.UseMySql(connectionString, serverVersion));
// Identity를 사용하는 코드
builder.Services.AddIdentity<ApplicationUser, ApplicationRole>()
.AddEntityFrameworkStores<ApplicationDbContext>()
.AddDefaultTokenProviders();
// 인증을 사용하는 코드. JWT를 사용한다.
builder.Services.AddAuthentication(options =>
{
options.DefaultAuthenticateScheme = JwtBearerDefaults.AuthenticationScheme;
options.DefaultChallengeScheme = JwtBearerDefaults.AuthenticationScheme;
options.DefaultScheme = JwtBearerDefaults.AuthenticationScheme;
}).AddJwtBearer(options =>
{
options.SaveToken = true;
options.RequireHttpsMetadata = false;
options.TokenValidationParameters = new TokenValidationParameters()
{
ValidateIssuer = true,
ValidateAudience = true,
ValidAudience = configuration["JWT:ValidAudience"], //appsettings.json의 JWT 키의 ValidAudience 키에 등록된 값을 사용한다는 뜻
ValidIssuer = configuration["JWT:ValidIssuer"], //appsettings.json의 JWT 키의 ValidIssuer 키에 등록된 값을 사용한다는 뜻
IssuerSigningKey = new SymmetricSecurityKey(Encoding.UTF8.GetBytes(configuration["JWT:Secret"]))
};
});
// var app = builder.Build() 아래에
// 인증을 사용하는 코드
app.UseAuthentication();
C#
복사

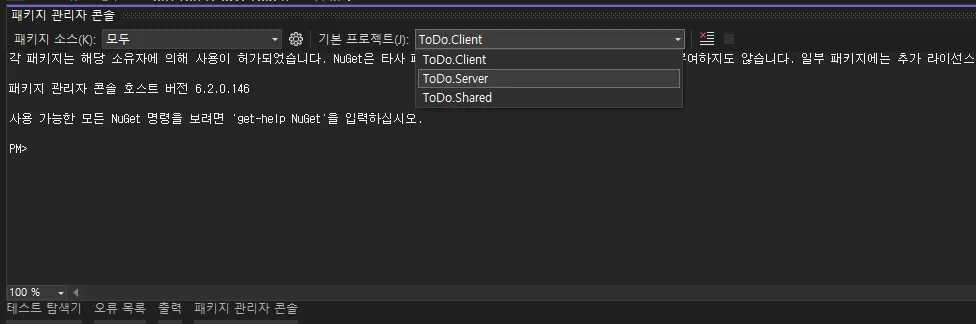
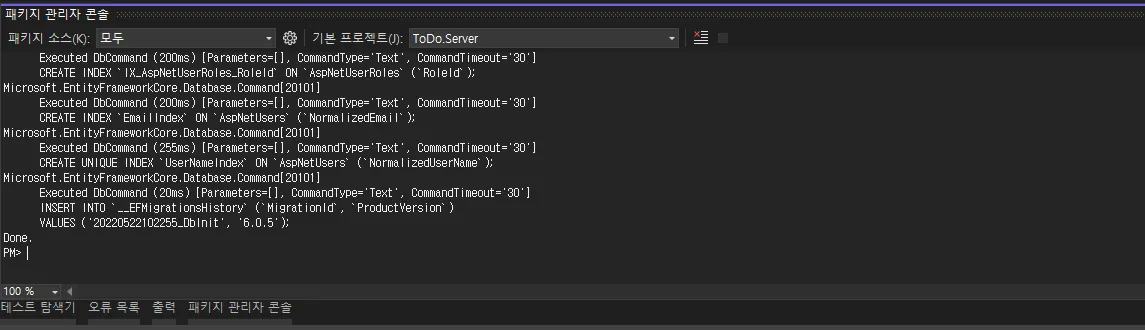
세팅이 다 되었으면 DB Migration을 한다. 솔루션에서 패키지 관리자 콘솔을 열고 Web API 프로젝트를 선택한다.
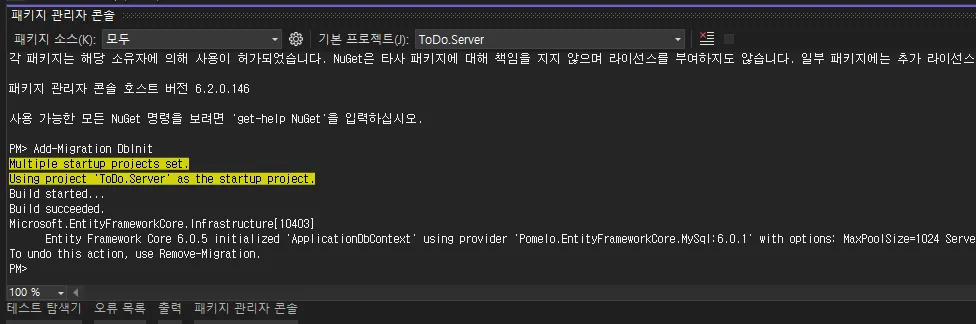
다음의 명령을 입력하면 알아서 Migration을 수행한다.
Add-Migration DbInit
PowerShell
복사
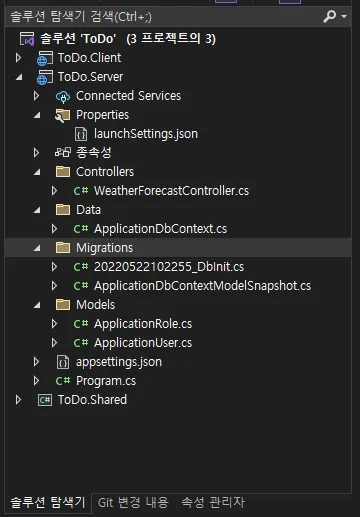
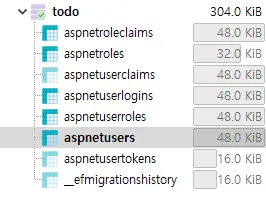
Migration이 끝나면 Migrations 폴더가 생기고 아래와 같이 Migration된 파일이 생성된다. 이것은 DB에 넣을 스키마를 정의한 것이고 아직 DB에 넣은 상태는 아니다.
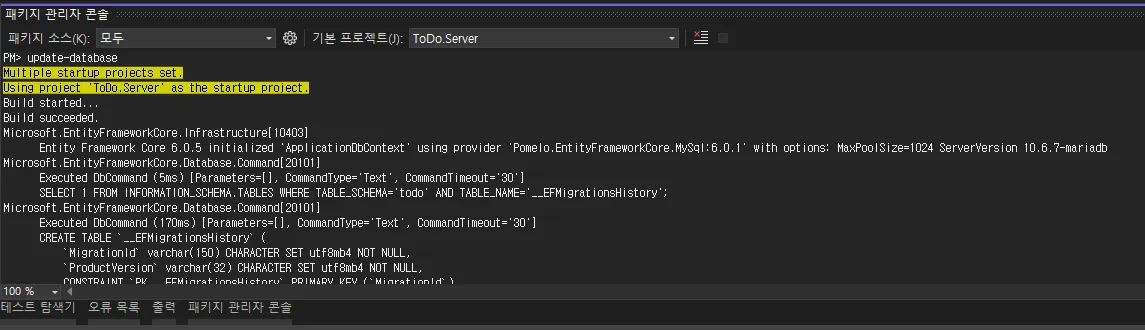
패키지 관리자 콘솔에서 아래의 명령을 입력하면 Migration 된 데이터가 DB에 실제로 입력된다.
Update-Database
PowerShell
복사
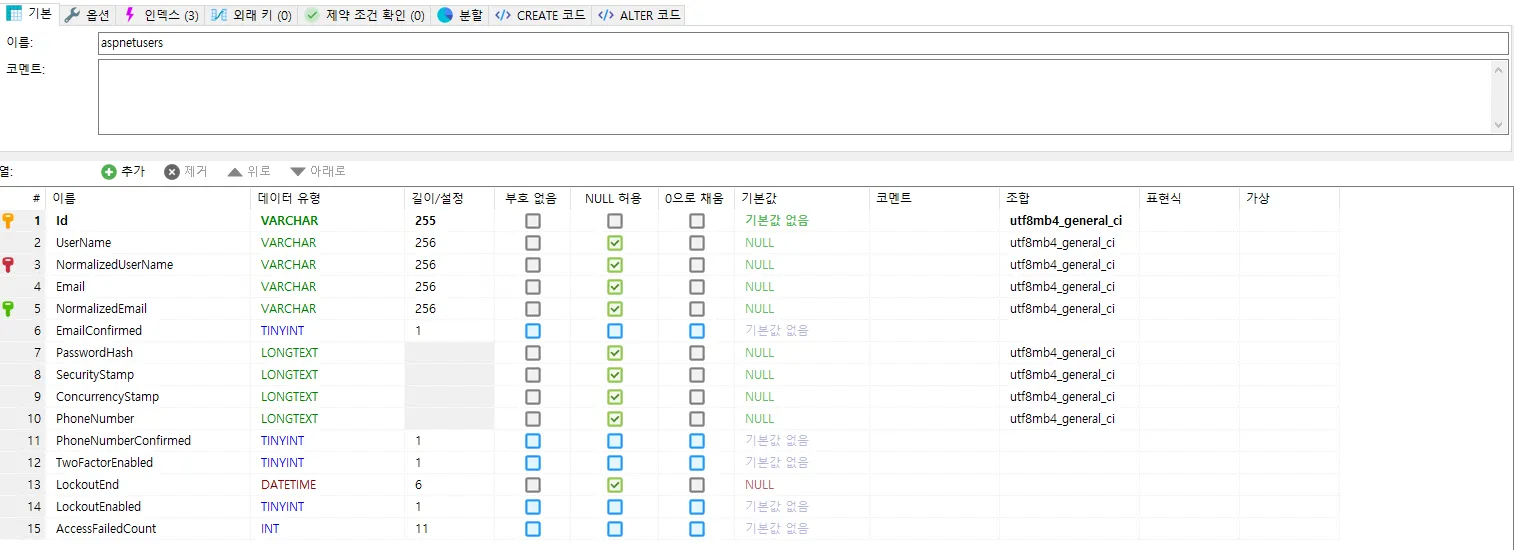
명령이 완료 된 뒤 실제 DB를 확인해 보면 아래와 같이 테이블이 생성되어 있는 것을 확인할 수 있다.
Controller 구성
DB를 구성했다면 클라이언트의 사용자 관리 요청을 처리할 Controller를 구성한다.
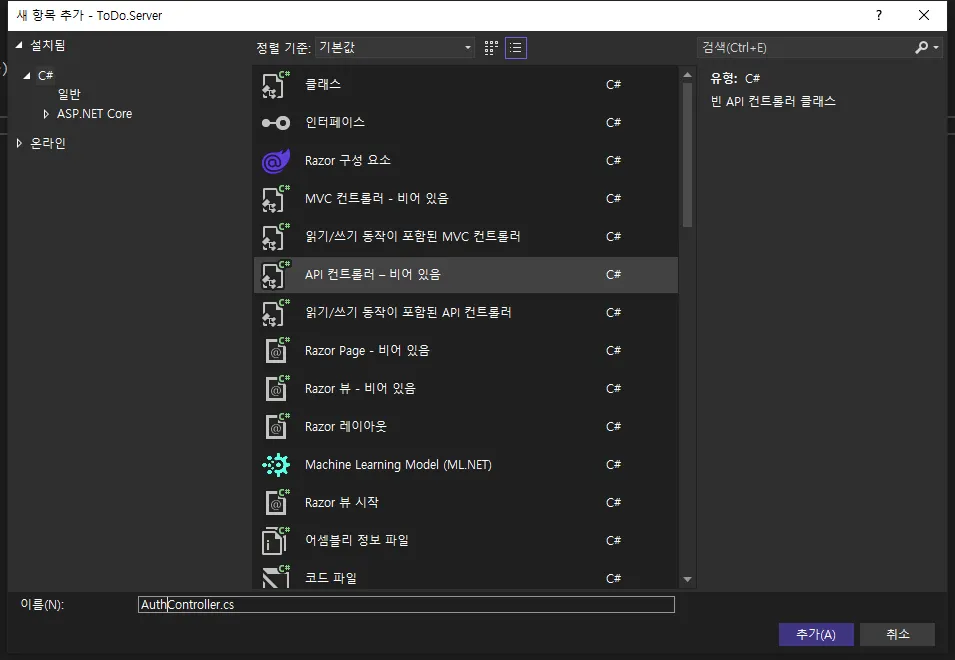
프로젝트의 Controllers 폴더에 우클릭 해서 추가 → 컨트롤러를 선택한다.
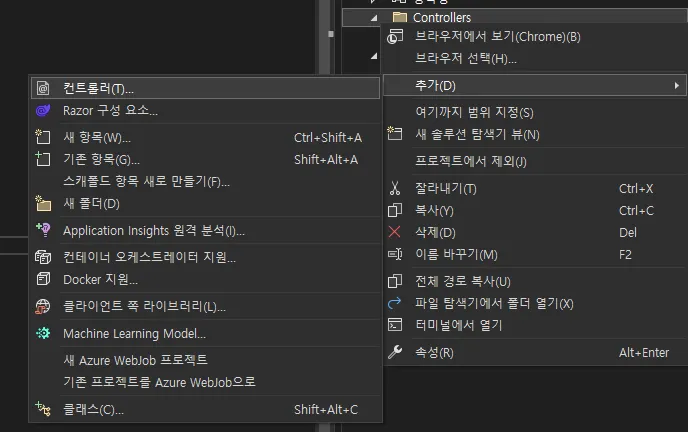
새 스캐폴드 항목 추가에서 공용 → API → API 컨트롤러 - 비어 있음을 선택한다.
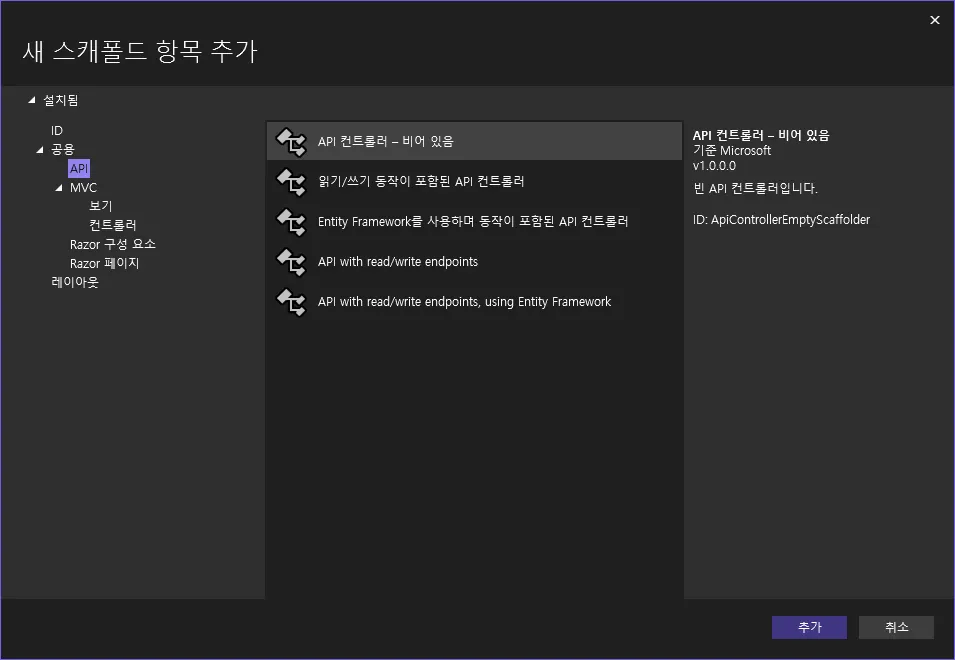
컨트롤러 이름은 뒤에 Controller를 붙이는 것이 관행이므로 AuthController라고 정의
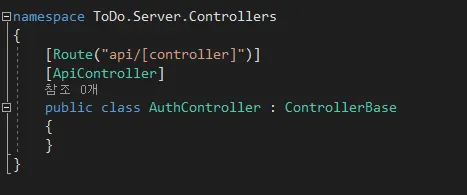
이렇게 만들어진 클래스는 아래와 같이 생겼다.
여기서 Route 특성은 해당 Controller로 접근하기 위한 URL을 의미하는데, 아래와 같이 작성되어 있으면 ‘<현재 프로젝트의 URL>/api/Auth’ 라는 이름으로 URL이 구성된다. —특성에 [controller]의 의미는 현재 클래스의 이름에서 Controller라는 부분을 제외한 나머지 이름을 이용한다는 의미이다.
이것은 Default로 정의된 이름일 뿐이고, 원한다면 적절한 이름을 Route 특성에 적으면 해당 이름으로 URL이 구성된다.
Controller 클래스이므로 [ApiController] 특성과 ControllerBase를 상속 받는 부분은 건드리지 말자.
클래스를 생성한 후 다음의 3가지 파라미터를 받도록 작성한다.
•
UserManager<ApplicationUser>
•
RoleManager<ApplicationRole>
•
IConfiguration
[Route("api/[controller]")]
[ApiController]
public class AuthController : ControllerBase
{
const string KEY_JWT_SECRET = "JWT:Secret";
const string KEY_JWT_VALID_ISSUER = "JWT:ValidIssuer";
const string KEY_JWT_VALID_AUDIENCE = "JWT:ValidAudience";
const string KEY_JWT_EXPIRE_DATE = "JWT:ExpireDate";
private readonly UserManager<ApplicationUser> userManager;
private readonly RoleManager<ApplicationRole> roleManager;
string secret, validIssuer, validAudience;
int expireDate;
public AuthController(UserManager<ApplicationUser> userManager, RoleManager<ApplicationRole> roleManager, IConfiguration configuration)
{
this.userManager = userManager;
this.roleManager = roleManager;
this.secret = configuration[KEY_JWT_SECRET];
this.validIssuer = configuration[KEY_JWT_VALID_ISSUER];
this.validAudience = configuration[KEY_JWT_VALID_AUDIENCE];
this.expireDate = int.Parse(configuration[KEY_JWT_EXPIRE_DATE]);
}
}
C#
복사
이름만으로도 예측이 되지만 UserManager는 사용자 관리, RoleManager는 역할 관리 (관리자, 일반 사용자, 게스트 등)를 의미하고 IConfiguration은 appsettings.json에 작성된 값을 사용하기 위해 사용한다. —위 코드에서는 configuration의 key는 한 번 가져오면 더 사용할 일이 없기 때문에 생성자에서 바로 값을 분해해서 멤버 변수에 담아두도록 작성했다.
프로젝트를 빌드해 보면 알겠지만 AuthController는 명시적으로 호출하는 곳이 없음에도 실제 Controller가 생성되고 정의한 파라미터까지 받는다. 이는 Controller가 ControllerBase를 상속 받고 있고, Program.cs에서 builder.Services.AddControllers()를 하고 있기 때문에 가능한 일이다.
사용자 등록
정의한 컨트롤러에서 사용자 등록 기능을 구현하기 위해 우선 Client와 Server에서 공통으로 사용할 사용자 등록 정보를 정의해야 한다. 관례적으로 이렇게 Server-Client를 왔다 갔다 하는 데이터는 DTO(Data Transfer Object) 라는 이름을 사용하므로 DtoRegister라는 클래스를 Shared 프로젝트에 아래와 같이 정의한다. —DTO를 Prefix로 할지 Suffix로 할지는 본인의 프로젝트 관리 규약에 따르면 된다.
public class DtoRegister
{
public string UserName { get; set; }
public string Email { get; set; }
public string Password { get; set; }
}
C#
복사
추가로 사용자의 Role을 관리하기 위해 Shared 프로젝트에 Data 폴더를 만들고 다음과 같이 class를 선언하자.
namespace ToDo.Shared.Data
{
public static class UserRole
{
public const string ADMIN = "Admin";
public const string USER = "User";
public const string GUEST = "Guest";
}
}
C#
복사
DTO를 정의했으면 AuthController에 Register 메서드를 추가한다.
[HttpPost]
[Route("register")]
public async Task<IActionResult> Register([FromBody] DtoRegister register)
{
try
{
ApplicationUser userExists = await this.userManager.FindByEmailAsync(register.Email);
if (userExists == null)
{
ApplicationUser user = new ApplicationUser()
{
UserName = register.UserName,
Email = register.Email,
// Password는 CreateAsync에서 해싱하므로 HashPassword를 사용할 필요 없음
};
// 여기서 ASP.NET Identity가 비밀번호를 자동으로 해싱
IdentityResult resultUser = await this.userManager.CreateAsync(user, register.Password);
if (resultUser.Succeeded)
{
// 일단 처음에는 user로 가입. 나중에 admin의 승인으로 admin 권한을 얻음. 최초 관리자는 시스템 세팅할 때 별도로 등록 함.
IdentityResult resultRole = await this.userManager.AddToRoleAsync(user, UserRole.USER);
if (resultRole.Succeeded)
{
return Ok();
}
else
{
return StatusCode(StatusCodes.Status500InternalServerError, "User Role creation failed! Please check user details and try again.");
}
}
else
{
return StatusCode(StatusCodes.Status500InternalServerError, "User creation failed! Please check user details and try again.");
}
}
else
{
return BadRequest("User already exists!");
}
}
catch (Exception ex)
{
return StatusCode(StatusCodes.Status500InternalServerError, ex.Message);
}
}
C#
복사
Controller 하위의 메서드들은 해당 컨트롤러의 URL 다음에 Route 특성에 작성된 이름을 붙여서 URL을 구성한다. 위의 Register 메서드는 ‘<프로젝트 URL>/api/auth/register’ 라는 URL로 접근할 수 있다.
메서드가 int, double 등 단순 형식이 아닌 클래스와 같은 복잡한 형식의 파라미터로 받게 되면 파라미터 앞에 [FromBody] 특성을 붙여주는 것이 좋다. —만일 URI에서 데이터를 읽어오게 하려면 [FromUri]를 사용할 수 있다.
사용자 로그인
사용자 로그인과 로그인 후 Token을 받기 위해 Login, Token DTO를 Shared에 정의한다.
public class DtoLogin
{
public string Email { get; set; }
public string Password { get; set; }
}
public class DtoLoginResult
{
public string Token { get; set; }
}
C#
복사
Controller에 사용자 email과 password를 받아서 login을 시도하고, 성공하면 토큰을 발행하는 메서드를 추가한다.
[HttpPost]
[Route("login")]
public async Task<ActionResult<DtoLoginResult>> Login([FromBody] DtoLogin login)
{
try
{
ApplicationUser user = await this.userManager.FindByEmailAsync(login.Email);
if (user != null)
{
// 비밀번호 검증 시 ASP.NET Identity의 CheckPasswordAsync 사용
if (await this.userManager.CheckPasswordAsync(user, login.Password))
{
var userRoles = await this.userManager.GetRolesAsync(user).ConfigureAwait(false);
// 토큰에 담을 Claim을 만든다. 인가에 필요한 정보를 모두 담는다.
List<Claim> claims = new List<Claim>();
claims.Add(new Claim(ClaimTypes.Email, user.Email));
claims.Add(new Claim(ClaimTypes.Name, user.UserName));
foreach (string userRole in userRoles)
{
claims.Add(new Claim(ClaimTypes.Role, userRole));
}
DateTime expires = DateTime.Now.AddDays(ADD_EXPIRE);
SymmetricSecurityKey authSigningKey = new SymmetricSecurityKey(Encoding.UTF8.GetBytes(this.secret));
SigningCredentials signingCredentials = new SigningCredentials(authSigningKey, SecurityAlgorithms.HmacSha256);
JwtSecurityToken jwt = new JwtSecurityToken(
issuer: this.validIssuer,
audience: this.validAudience,
expires: expires,
claims: claims,
signingCredentials: signingCredentials
);
string token = new JwtSecurityTokenHandler().WriteToken(jwt);
return Ok(new DtoLoginResult() { Token = token, });
}
else
{
return NotFound("Invalid Password");
}
}
else
{
return NotFound("Invalid Email");
}
}
catch (Exception ex)
{
return StatusCode(StatusCodes.Status500InternalServerError, ex.Message);
}
}
C#
복사
Controller 인가 설정
JWT에 사용자의 Role까지 설정 되었으므로 토큰만 있으면 Controller에 인가 설정을 할 수 있다. ASP Core에서는 대단히 간단하게 할 수 있는데, 아래와 같이 [Authorize] 특성만 부여하면 된다.
만일 Role 기준으로 인가를 설정하려면 특성 안에 ‘( )’로 작성하면 된다. 당연하지만 개별 메서드 단에도 적용 가능하다.
[Authorize] // 인증된 사용자만 접근 가능
[ApiController]
[Route("[controller]")]
public class WeatherForecastController : ControllerBase
{
private static readonly string[] Summaries = new[]
{
"Freezing", "Bracing", "Chilly", "Cool", "Mild", "Warm", "Balmy", "Hot", "Sweltering", "Scorching"
};
private readonly ILogger<WeatherForecastController> _logger;
public WeatherForecastController(ILogger<WeatherForecastController> logger)
{
_logger = logger;
}
[Authorize(Roles = UserRole.ADMIN)] // 인증된 사용자 중 ADMIN만 접근 가능
[HttpGet(Name = "GetWeatherForecast")]
public IEnumerable<DtoWeatherForecast> Get()
{
return Enumerable.Range(1, 5).Select(index => new DtoWeatherForecast
{
Date = DateTime.Now.AddDays(index),
TemperatureC = Random.Shared.Next(-20, 55),
Summary = Summaries[Random.Shared.Next(Summaries.Length)]
})
.ToArray();
}
}
C#
복사
시리즈
이 글은 아래와 같은 시리즈로 이루어짐